Here's how to get started with tracking custom events using GTM.
Create a Custom Tag
First create a custom tag by following the steps below:
- Create a new tag.
- Change the tag title to something descriptive, e.g.
Stormly – General Library – All Pages - Select the tag type as
Custom HTML -
Paste the Stormly tracking code inside the HTML field. Navigate to
stormly.com/projects,
click
Setup Dataon the current project. The code looks like this:<script type="text/javascript">(function(e,t,n,r,i,s,o){e["StormlyObject"]=i;e[i]=e[i]||function(){(e[i].q=e[i].q||[]).push(arguments)},s=t.createElement(n),o=t.getElementsByTagName(n)[0];s.async=1;s.src=r;o.parentNode.insertBefore(s,o)}) (window,document,"script","//cdn.stormly.com/assets/tracking/t.js","stormly"); stormly("create", "YOUR_STORMLY_KEY", {domain: "tt7bxiq.t.stormly.com", anonymizeIP: false, pageviewTracking: true, clickTracking: true, storeOnlyOneCookie: true}); </script> - Click advanced settings and change the tag firing option to
Once per Page - Click on the triggering option and select
All Pagesdefault trigger - Save and preview the tag to make sure it is firing
Tracking History Changes As Pageviews
When you use frontend libraries like React or Vue, there are no individual pageview loads in the sense of a complete page reloading on navigation. To automatically track pageviews whenever the browser history changes, use the following steps:
-
In most cases, first disable automatic pageview tracking from the Stormly library itself, otherwise you'd get two pageviews tracked on initial page loads.
Check your network console on a fresh page load — if you see two requests to
*.t.stormly.comwith payload_type: pageview, go back to the custom tag and replacepageviewTracking: truewithpageviewTracking: false. - Create a new tag called "Stormly - Pageview - History Change"
- Select the tag type as
Custom HTML -
Paste the code inside the HTML field as-is:
<script type="text/javascript">stormly('pageview');</script> - Click
Advanced settings→Tag sequencingand select the Stormly library to fire before this tag. - Click on the triggering option and click the top-right (+) icon to create a new trigger.
- Click on the empty Trigger Configuration area, select "History Change" under the "Other" category.
- Save the new trigger — it will be automatically selected for your new tag.
-
Here's how your configuration should look:
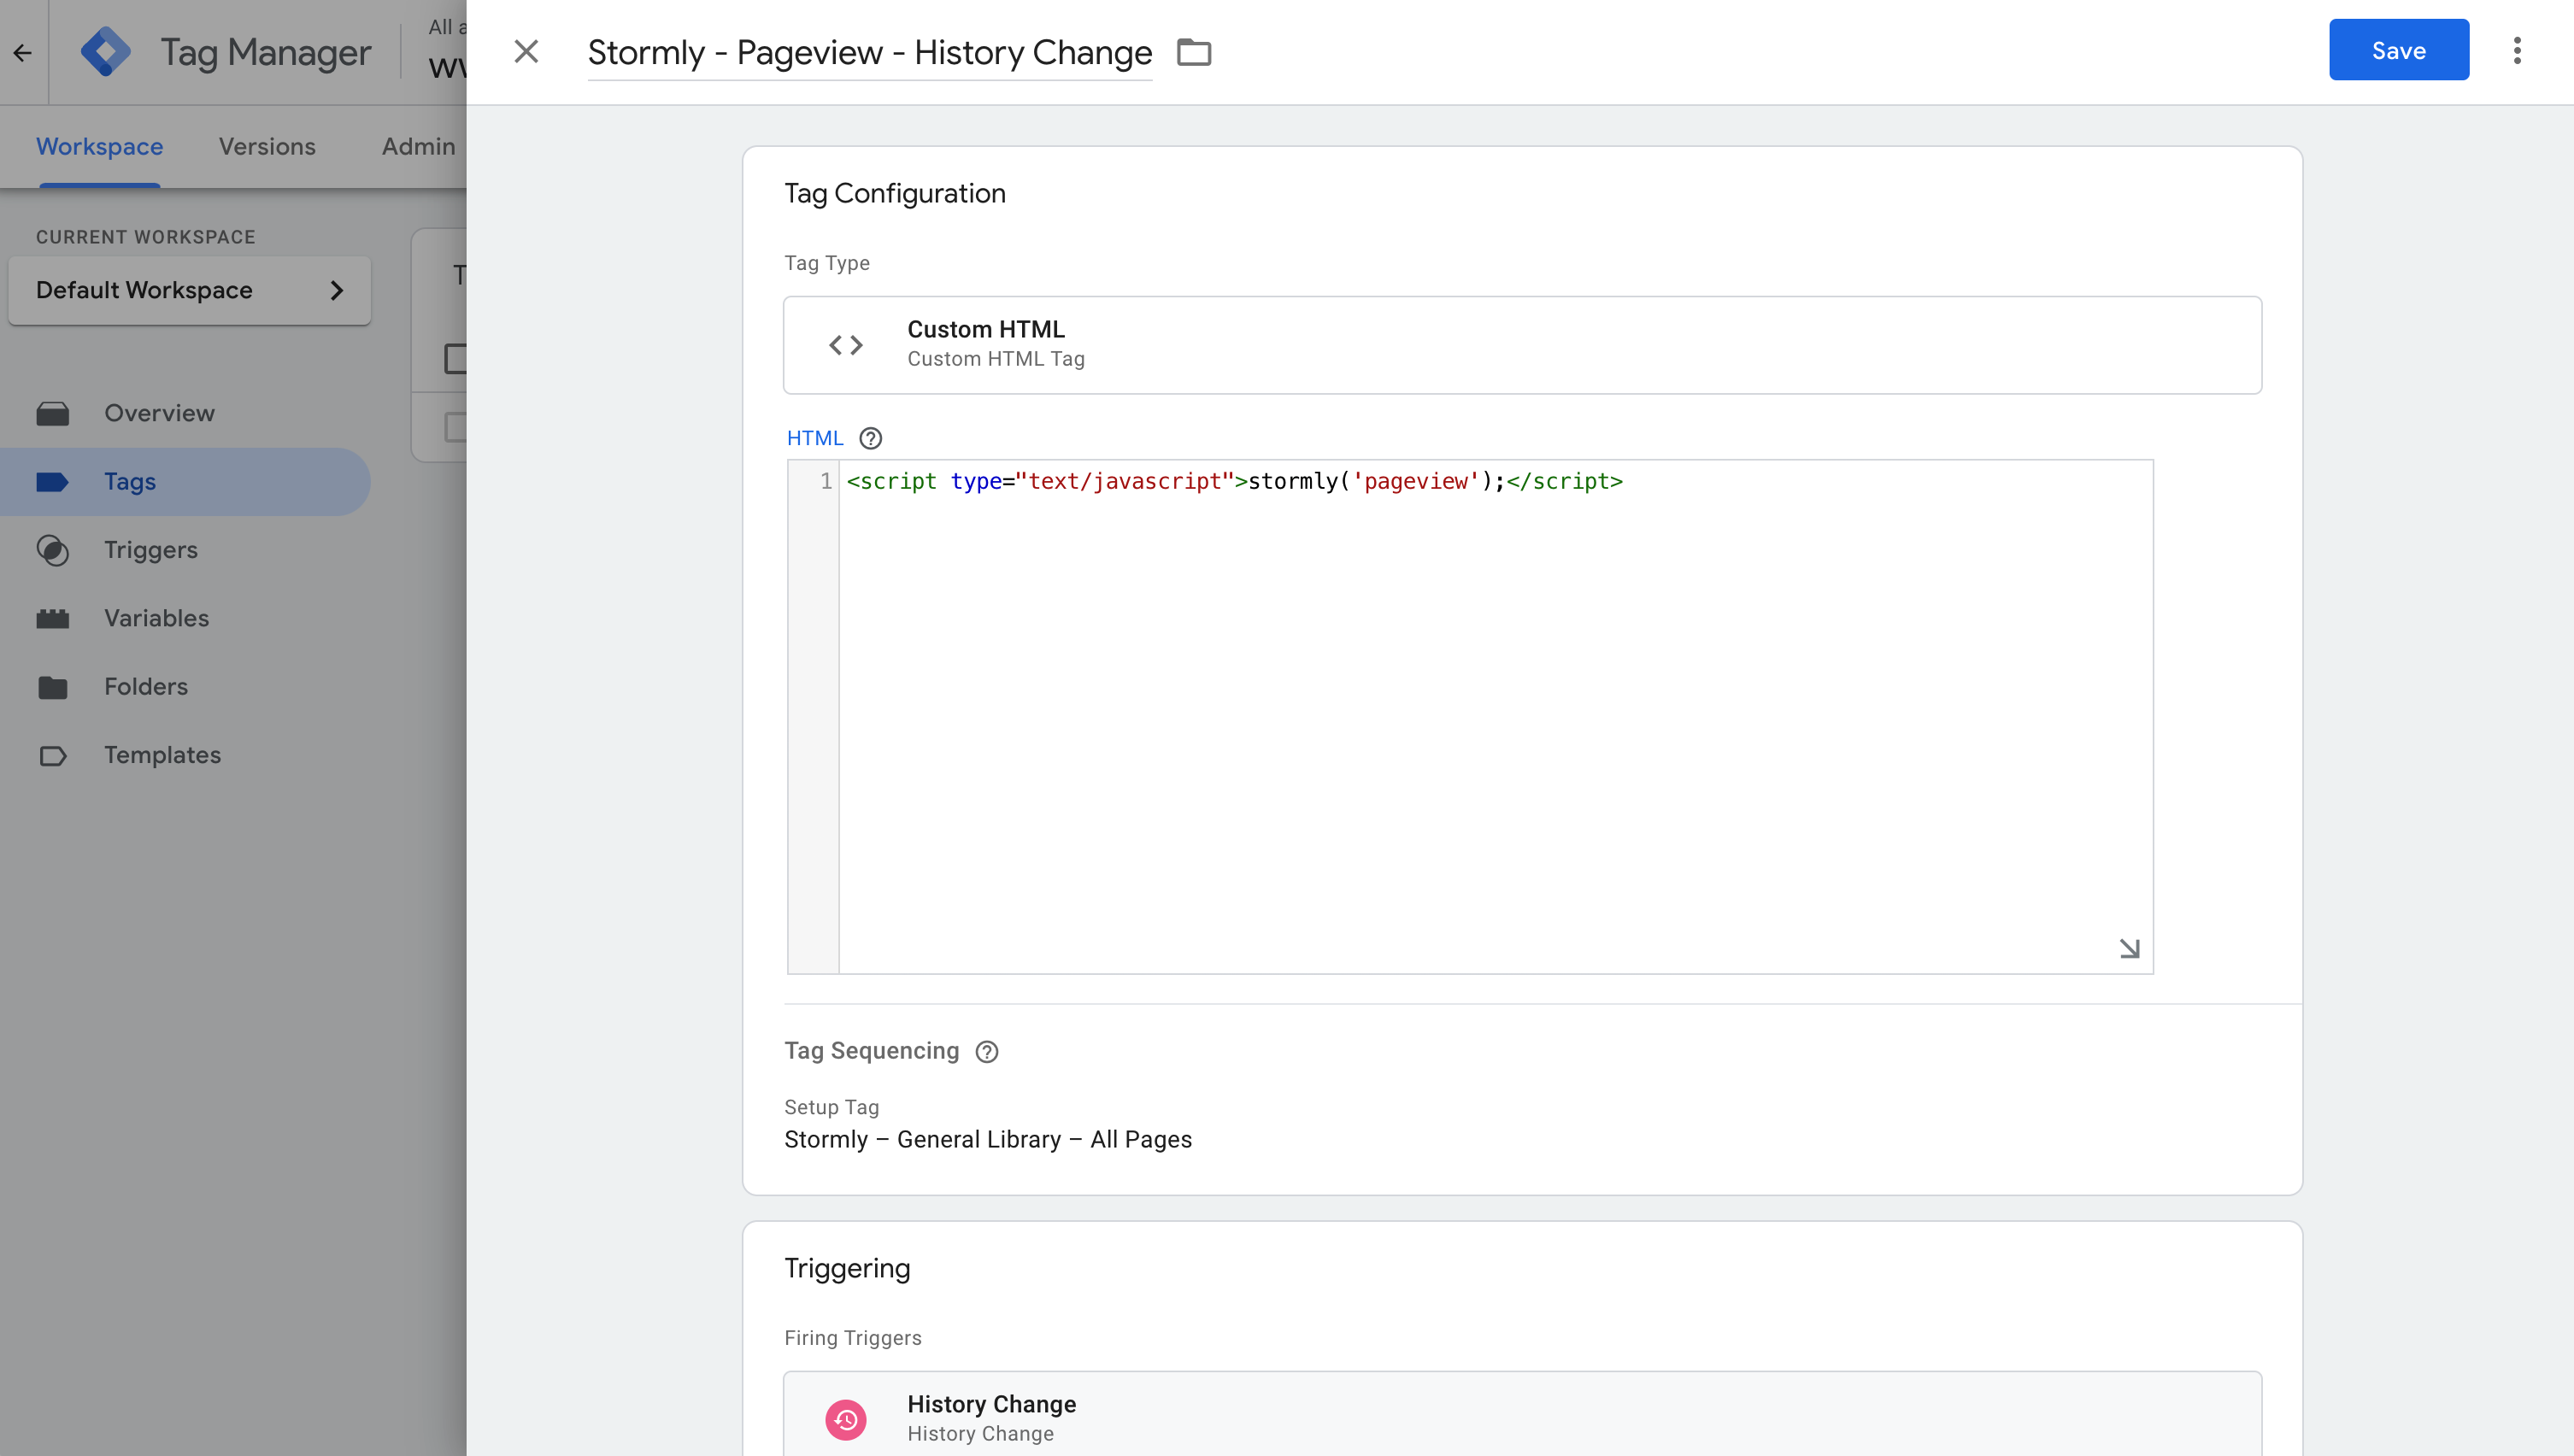
- Once saved and submitted, you will have automatic pageview tracking based on history changes.
Custom Event Tracking
Our automatic tracking takes care of the majority of tracking. But in case you'd like to track additional custom events and properties, use the following steps.
Tracking click events
In the example below, we will trigger a tracking event on a link click.
- Click
Triggersfrom the left menu in tag manager - Create a new trigger and rename it
- Select the trigger type as
Just Links -
Configure the trigger as displayed in the image below. Note that the
Page pathandClick IDhave to be customized to your own page structure and element IDs:
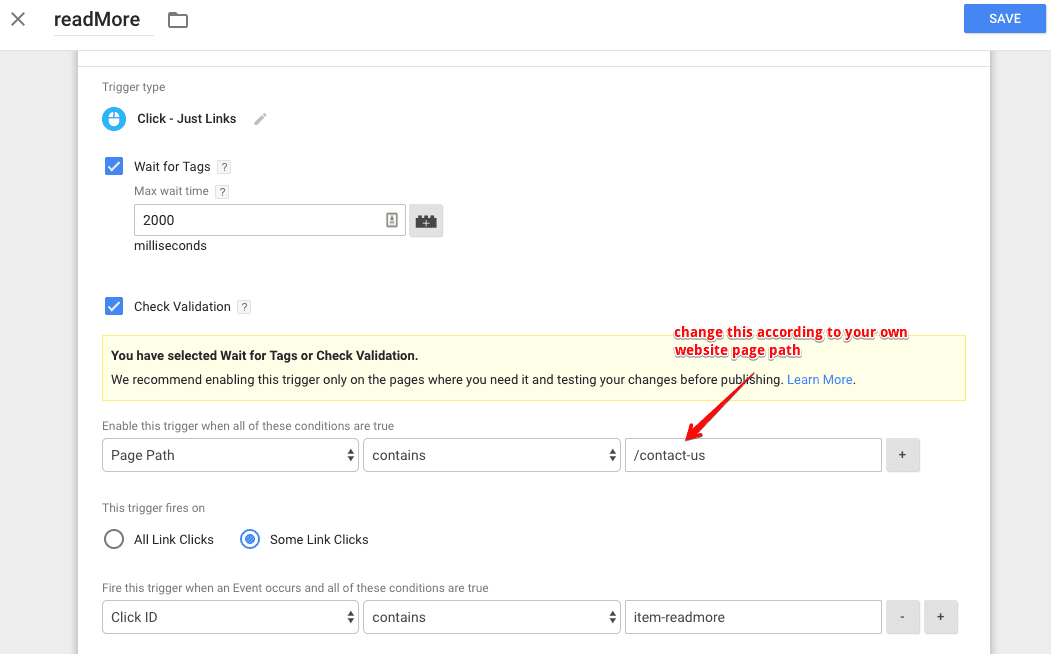
- Save the trigger
Now create the link click tag that will send data to Stormly:
- Create a new tag and rename it
- Select the tag type as
Custom HTML -
Copy and paste the code below into the HTML field:
The second argument containing<script>stormly("event", "Item Read More", {category: "tutorial", words: 800});</script>categoryandwordsgives the event more context, but can be left out if not needed. -
Click
Advanced settings→Tag sequencingand select the Stormly library to fire before the event tag:
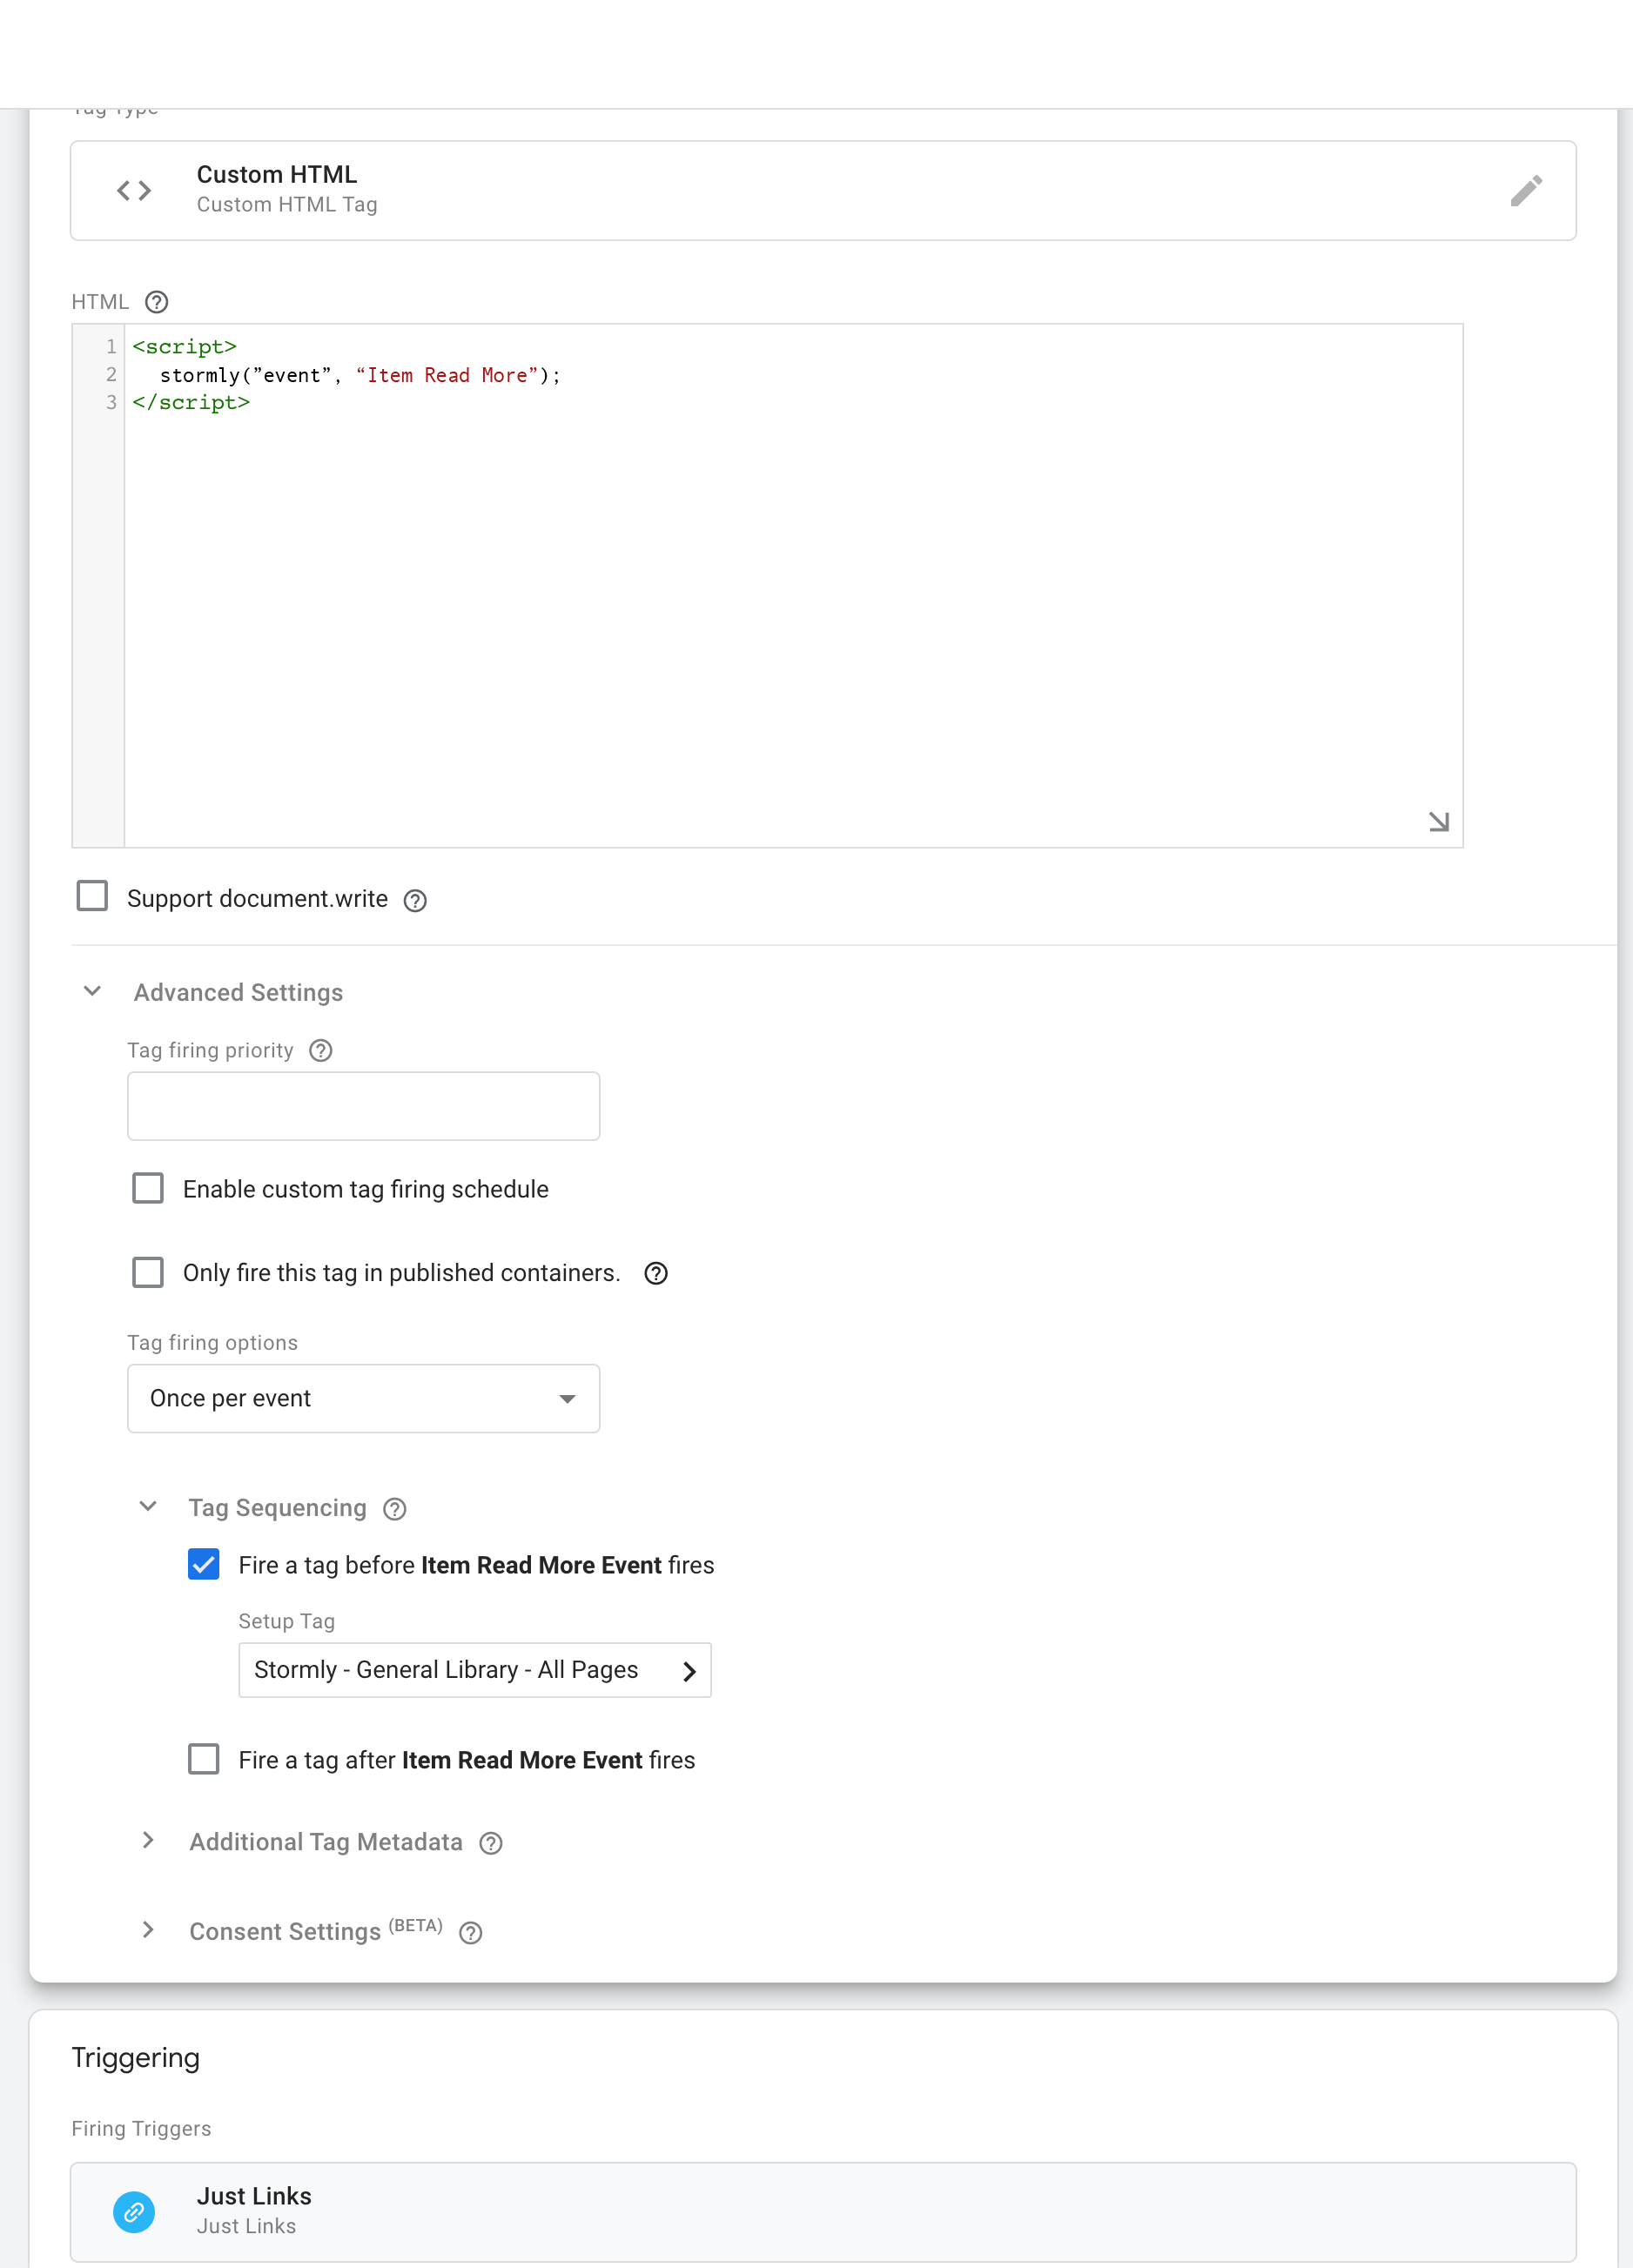
- Add the trigger we created earlier
- Save the tag, refresh preview mode and test
- Open Stormly and load the "Event Trends" report. Set the date range to
Todayto see the events immediately.
Repeat this process for all other event behaviors you'd like to track, and you're set!
Note: Tracked data becomes available in Stormly within seconds usually, but new projects become "active" only once at least 50 unique users are tracked.
Other tracking functions
There are two other tracking functions you can use but are not required:
-
Setting attributes on users, such as their favorite color:
<script>stormly("set", {favoriteColor: "blue", favoriteHolidayDestination: "Spain"});</script> -
Identifying an anonymous user so the same user on different devices can be linked as one:
<script>stormly("identify", "user-12345");</script>